ADDITIONAL NOTE: This was written before we initially discussed this. Further down is a slightly old way of connecting virtual instruments, but the knowledge of how it works is important (especially if you are troubleshooting). However, in pretty much every modern DAW, you can just drag and instrument onto a track, and it will do the connections for you – as we saw in the lesson (have a look back at the video!).
- Connect your MIDI interface.
Thankfully, today, most MIDI keyboards are USB based, and do MIDI over USB. This is as simple as plugging in your interface into your computer. For the most part, Apple Macs won’t need device drivers, and for most keyboards, Windows doesn’t either, but if you do need them, grab them off the manufacturer’s website, and install them before plugging in!
- Starting a New Project
Your DAW may have many preset/template project files for you to start with, but in this case, we’ll just imagine a blank, empty template. The first thing to deal with is Sample Rate and Bit Depth.
CD Standard: 16Bit 44.1kHz
Digital Video Standard: 24Bit, 48kHz
I’d consider the second to be the absolute minimum to start with if you can.

These settings are usually found in the ‘Project Setup’ in your DAW, but in some, they may be set universally somewhere else.

24 Bit has a much greater dynamic range than 16 Bit (with a dynamic range of 144dB vs 96dB). This means you can record at lower volumes without worrying about losing much of your audio to background noise, whilst protecting yourself from clipping (overdriving) either your audio interface, or plugins in your project’s chains. I don’t believe that there are any available audio interfaces with a dynamic range greater than 120dB overall, but that’s significantly better than 96dB – you may as well take advantage of this, but bear in mind, of you’re recording a noisy source, you’re still going to get noise – deal with this at the microphone end!
A Sample Rate of 48kHz isn’t a bad idea either. You could also go for much higher sample rates, but to be honest, it’s not usually that important. (For the techies – it reduces aliasing that can come from digital processing, and also allows for a more gentle low-pass anti-aliasing filter that is shifted out of the audible range 🙂 )
16Bit 44.1kHz would be fine, but I’d go higher if you can. The only two disadvantages of increasing these values is there is an increase in file size (quite dramatically) and an increase in CPU usage to process those files.
From here, we want to make some sounds. Your project is set up, your controller is plugged in, and we’re ready to go!
Different DAWs will have different ways of dealing with this, but every DAW will have two basic types of tracks. Audio and MIDI. We’re going to set up a MIDI track, an instance of Kontakt, and get them to talk to each other.
Firstly, let’s add a MIDI track.

You can see the other types of tracks that are available to me here, but we’ll keep this simple.
 |  |
With my MIDI track selected, you can see I have various options. The most important here are Input, Output and Channel Number.
MIDI In – Where the signal is coming FROM (e.g. your controller) – your DAW should have recognised it, so simply select it. However, as you can see, there may be and ‘All MIDI Inputs’ option, which will usually work well if you only have one keyboard.
MIDI Out – Where the signal is going TO (e.g. Kontakt)
MIDI Channel – The MIDI spec (which is 40 years old) specifies for 16 channels per instance. This will be important when connecting to Kontakt. You can also select the ‘OMNI’ channel, but if you use more than one instrument, this can create problems.
Next, we add an instance of Kontakt. This will be DAW dependent as to how you do this, but it will create new tracks for Kontakt.

Go back to your ‘Arrange’ Window, and click on the MIDI track we created. You will now want to select the output, and set it to Kontakt. Your MIDI channel (and you keyboard) can now communicate with Kontakt.
We can now add an instrument to Kontakt.
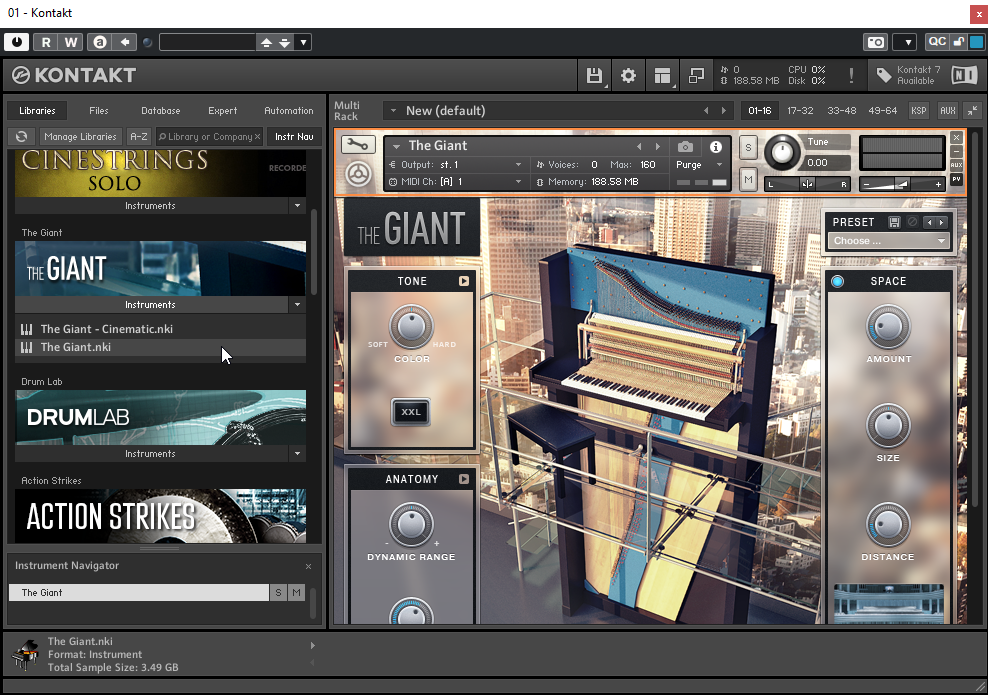
On the left hand side in Kontakt will be a list of the instruments you have installed for it. Beneath their name is a drop down menu that shows you each of the versions of that instrument you can activate. Double click the one that you want, and it will open in the right hand window.

Finally – Select your MIDI track, and check the MIDI channel it is broadcasting on.

Now check that in Kontakt, the same channel is selected on your chosen instrument (circled). You should now be able to play your instrument! Once these are saved in your project, you don’t have to check these again. If you add another instrument into Kontakt, and you don’t want it to play the same DATA as the first instrument, choose the next available MIDI channel, create an new MIDI track, and set its channel to that number.
Remember, it’s now possible to save this as a Template that you can load up for future projects, saving you the time and trouble of setting this up again.